Data Dictionary Explorer
The 5.0 release introduces a new data dictionary explorer application hosted at https://data-dict.abcdstudy.org/. This application replaces the static data dictionary functionality on NDA’s website.
The data dictionary explorer has two main pages:
- The Variable Selection page allows users to explore the ontology of ABCD data tables, i.e., their hierarchical organization into domains and subdomains, as well as the data dictionary, i.e., how variables are grouped into different tables, in an interactive manner and provides extensive filter and search capabilities. Users can select variables and add them to a selection of variables of interest.
- The Manage Selections and Downloads page allows users to manage their selection of variables and download a data dictionary containing just these variables. (This application does not allow to download the data itself. Users with a valid data use certificate can download the data through NDA).
This page introduces the application and gives an overview of the functionality.
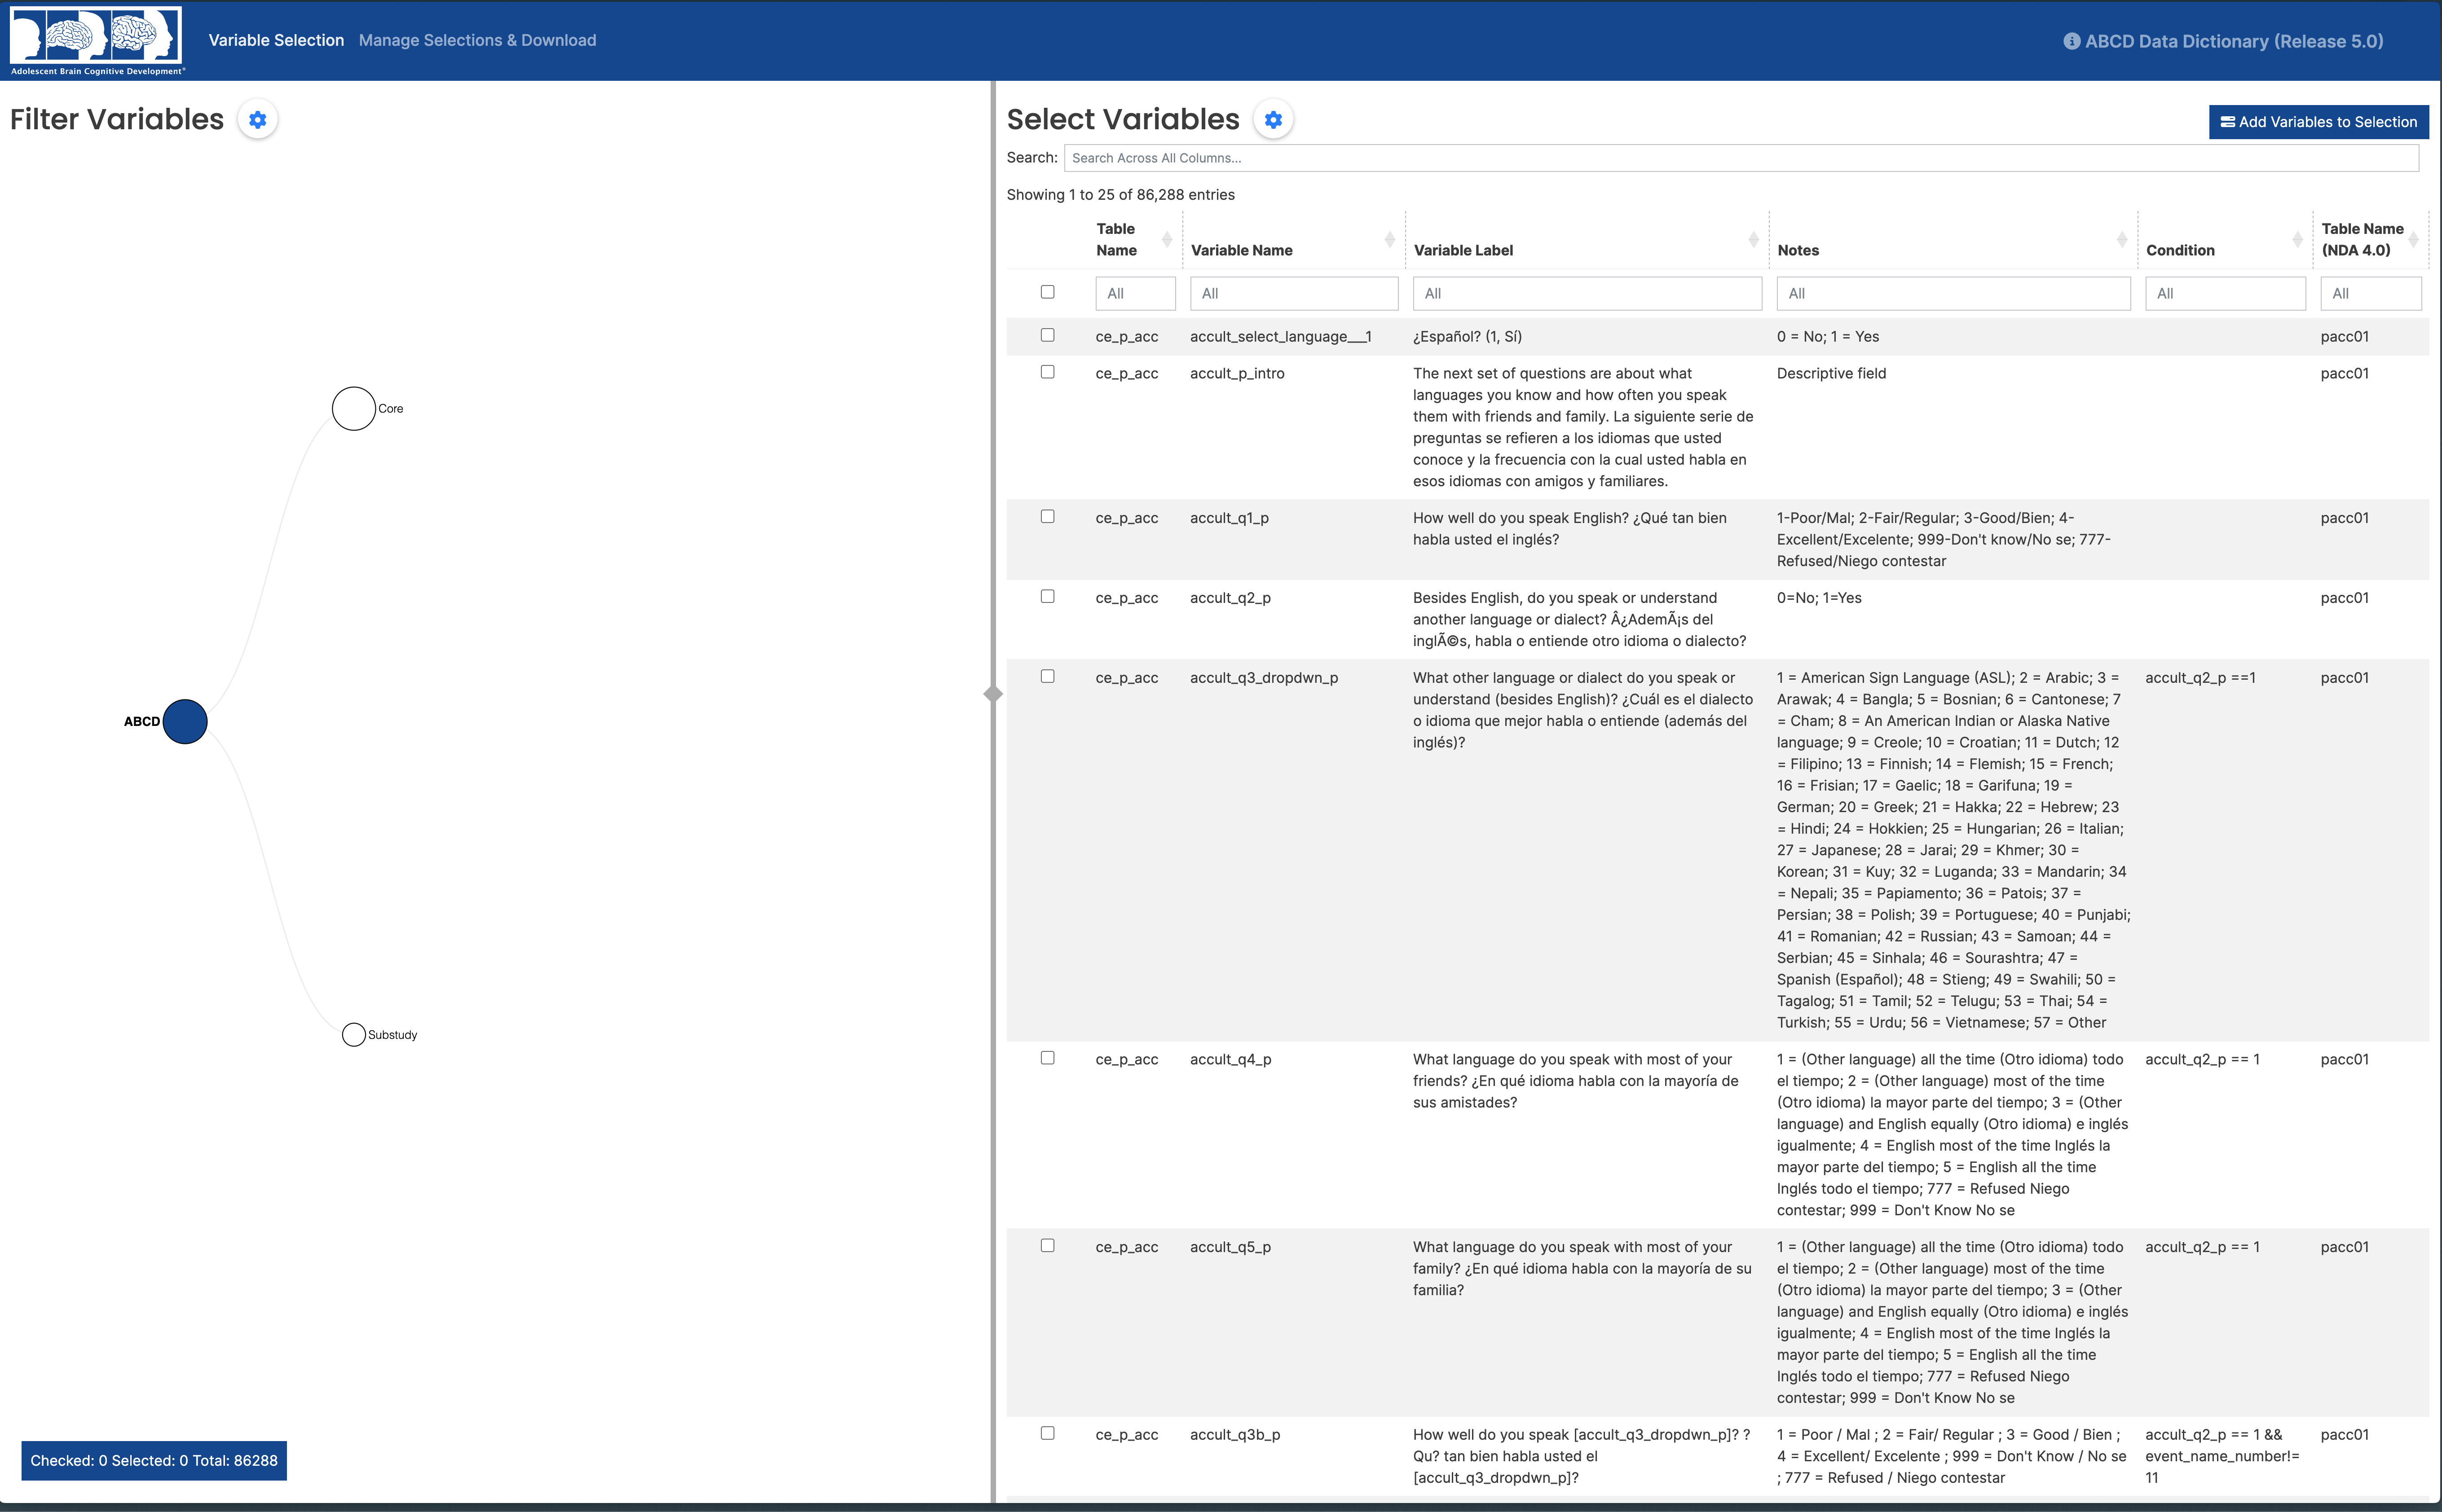
Variable Selection
The Variable Selection page has two major components:
- The Filter Variables component on the left-hand side allows to explore the ontology of ABCD data tables, i.e., how tables are hierarchically grouped into domains, sub-domains, etc. using a tree-based selector
- The Select Variables component on the right-hand side displays the data dictionary in an interactive table. It contains information about variables’ names, labels (descriptions), the table they belong to, and additional information like levels for categorical variables or branching/skip logic where appropriate.
Note: The horizontal border between the two components can be dragged to the left or right side to make either side take up more of the available vertical space.
Filter Variables
Tree selector
The tree selector on the left hand side can be used to explore ABCD’s ontology, i.e., how data tables are organized hierarchically into different levels. By clicking on a node or on the label displayed next to it, the node can be expanded and the next lower hierarchy level will be displayed (after selecting a node, it is colored in blue and the label is displayed on the left instead of the right side). Clicking on an expanded node collapses it again.
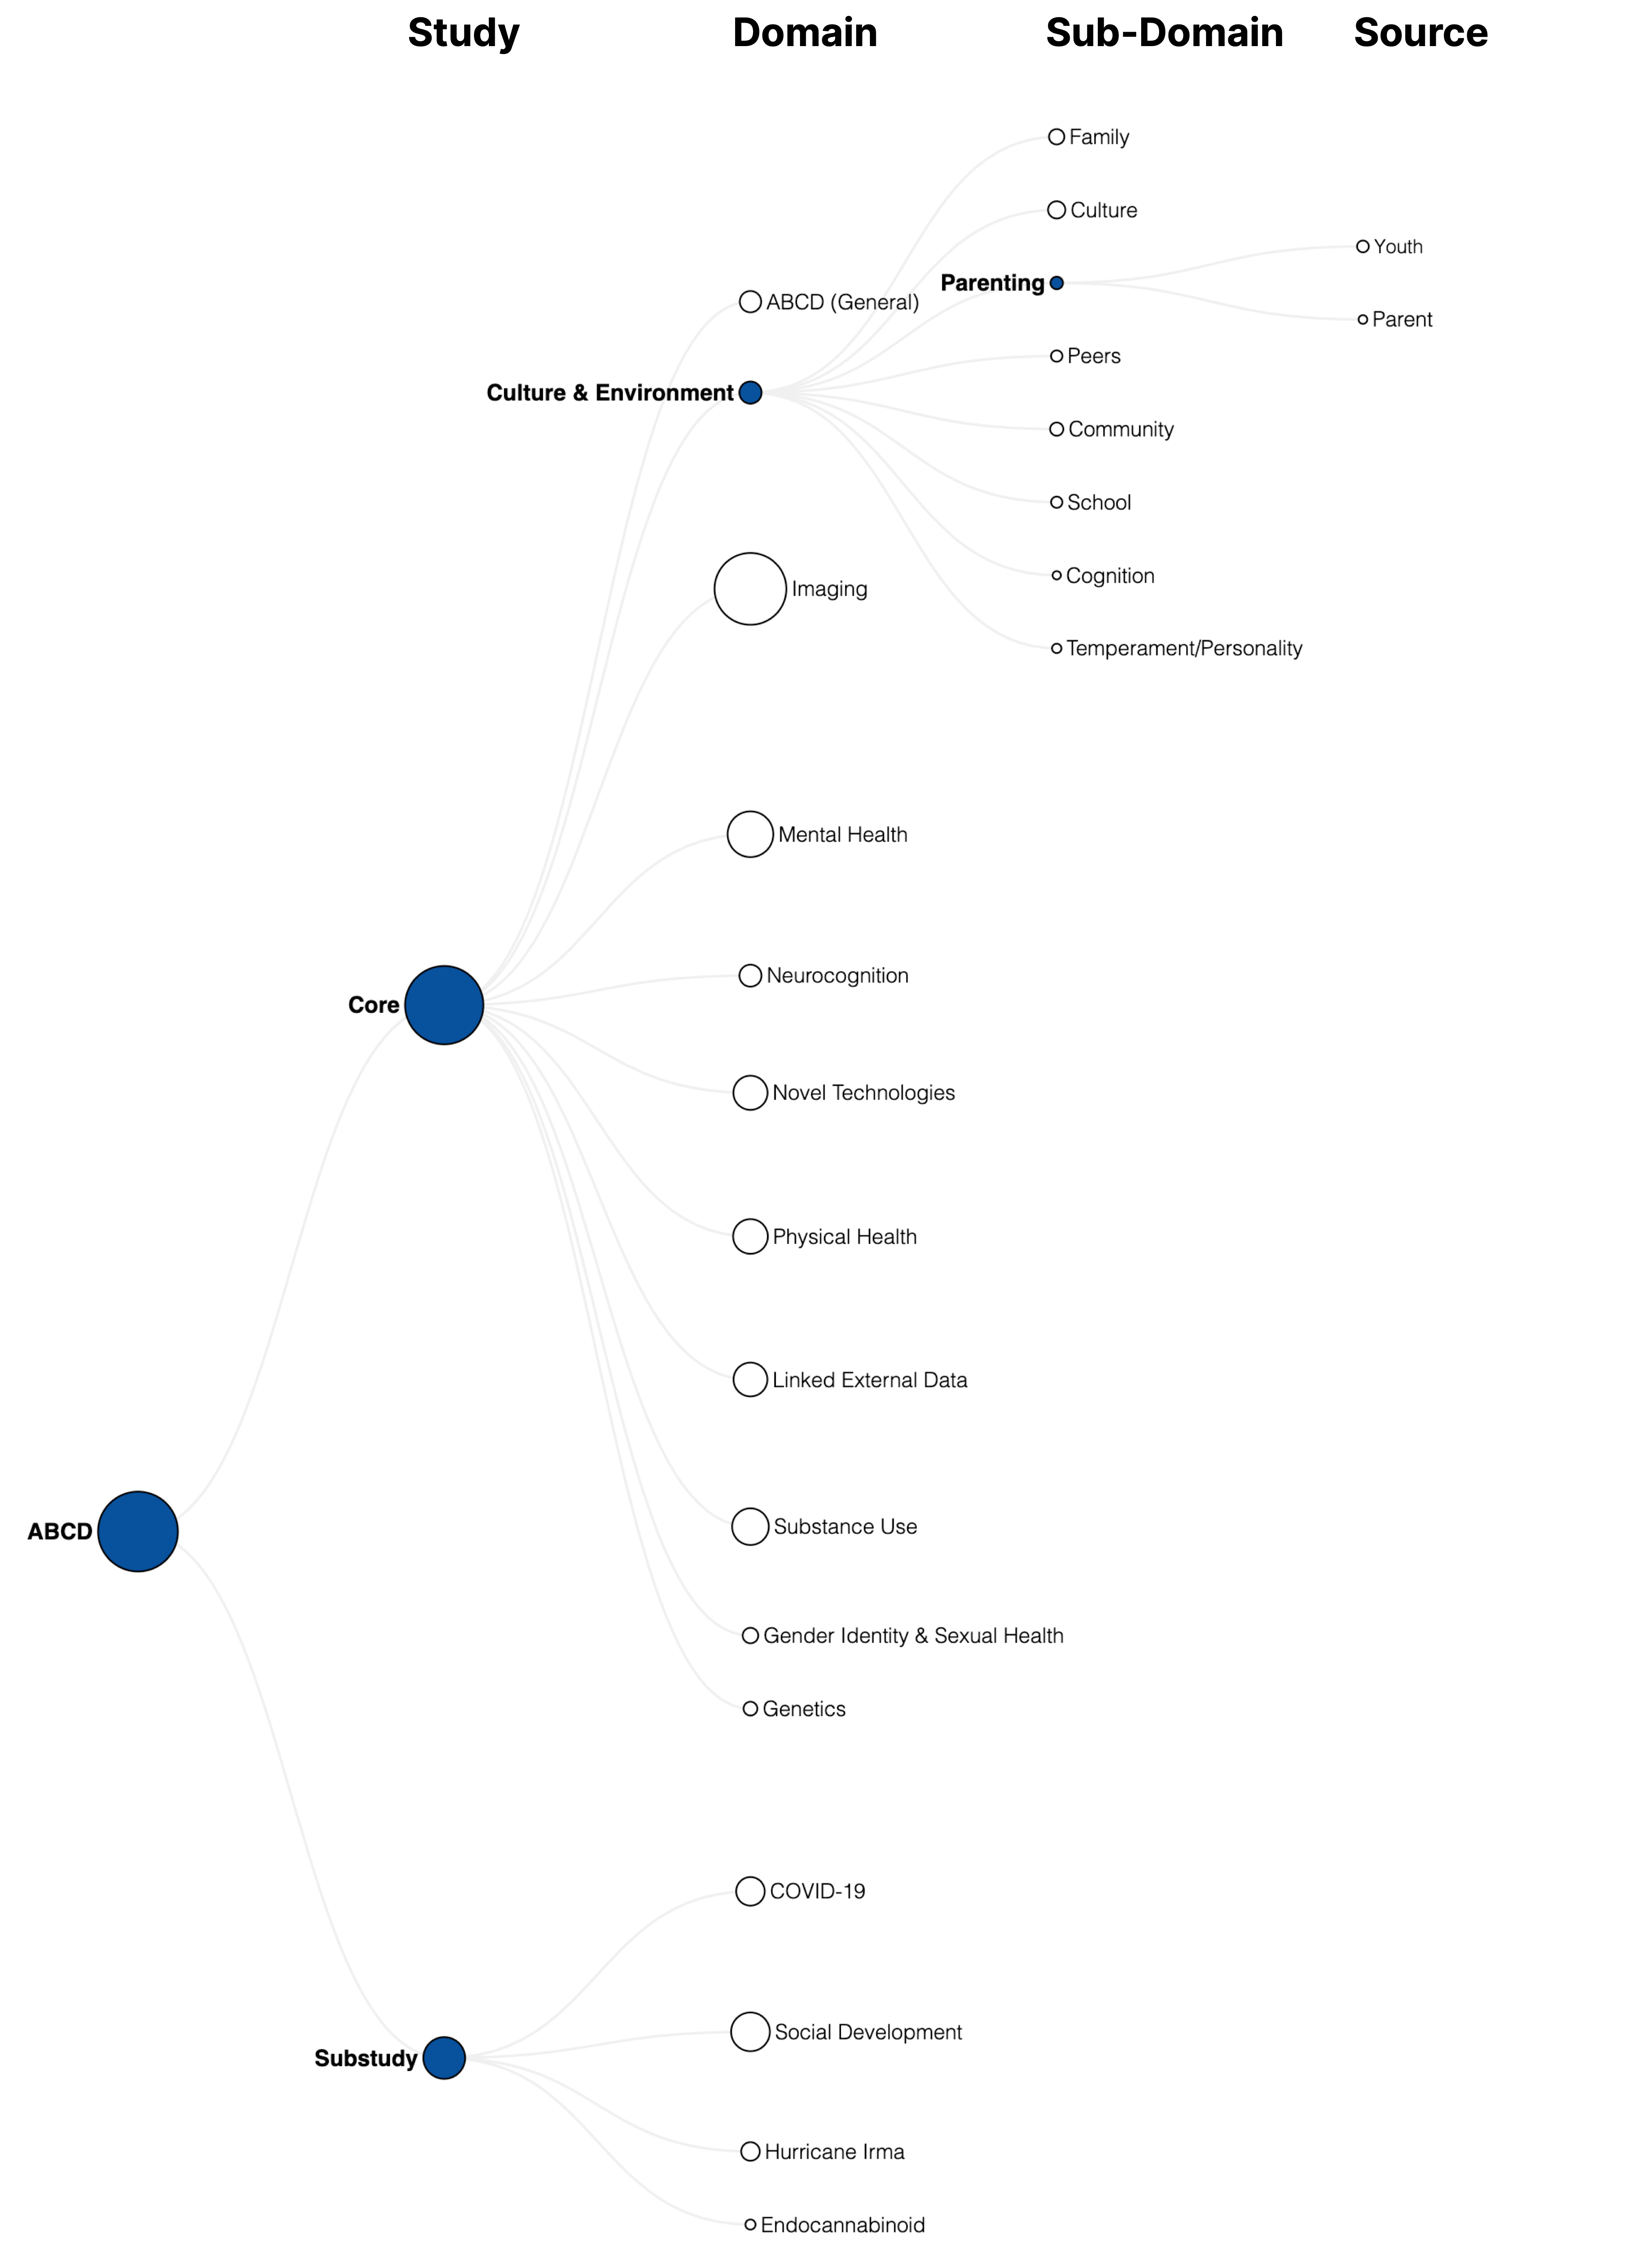
Selections in the tree automatically filter the data dictionary displayed in the table on the right-hand side, i.e., the more fine-grained the selection of nodes in the tree on the left-hand side, the fewer variables will be displayed in the table. Users can use this to drill down into one or several domains, sub-domains, etc. For example, the following figure shows three selection states

- ABCD: only the initial node is selected (all variables are included)
- ABCD > Substudy: On the second hierarchy level (study), the Substudy node is selected (only substudy variables are included)
- ABCD > Substudy > COVID-19: On the third hierarchy level (domain), the COVID-19 node is selected (only COVID-19 variables are included)
Notes:
- The tree automatically changes size and auto-focuses on the last selected node; to manually change its size and position,
- click, hold, and move in any direction to move the tree to the desired position
- with the mouse over the tree, scroll up/down to zoom out/in
- The size of the nodes represents the number of variables that are nested within that level of the hierarchy (for example, the node for Core is much larger than that for Substudy because Core contains a lot more tables and associated variables).
Tree hierarchy
On application load, the standard selection and order of hierarchy levels is the following:
Changing the hierarchy
Both the selection and order of hierarchy levels can be changed by
- clicking on the gear icon at the top of the Filter Variables section

- selecting one the following options:
| Action | Selection |
|---|---|
to remove one of the hierarchy levels, click on the x on the right side of the respective hierarchy level in the Tree Hierarchy selector |
 |
| to add a hierarchy level, select it in the dropdown menu that is displayed when clicking on the expansion triangle on the right-hand side of the Tree Hierarchy selector |  |
| to reorder the hierarchy levels, drag the hierarchy level you would like to move to another position |  |
| to reset the hierarchy to the standard selection and order, click on the reset button above the Tree Hierarchy selector |  |
MRI Mode
The option menu also provides the additional option to set the hierarchy to “MRI Mode” which is more useful when browsing the data tables in the Imaging domain.
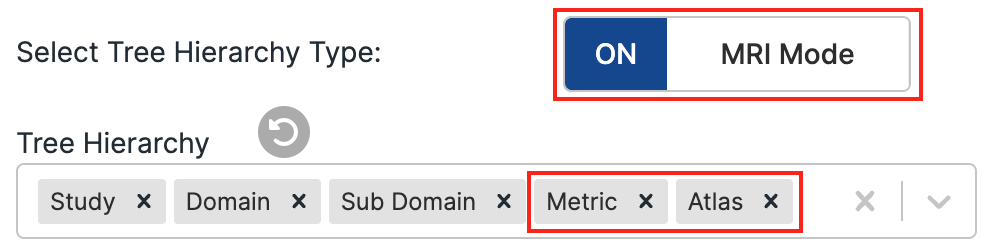
This will
- remove the Source hierarchy level (as the source for the Imaging domain is always “Youth”)
- add two more imaging-specific hierarchy levels
- Metric
- Atlas

URL parameters
The tree hierarchy and selection of nodes can also be specified by appending one or several URL parameters to the base URL like https//data-dict.abcdstudy.org?parameter_1=valueA,valueB¶meter_2=valueC. This is a good option if one would like to open the application with a certain predefined selection, for example, to send a colleague the data dictionary of a specific table or a domain.
| Parameter | Valid values | Example |
|---|---|---|
hierarchy |
st = study |
hierarchy=StDoMeAt |
Do = Domain |
||
Sd = Sub-Domain |
||
So = Source |
||
Me = Metric |
||
At = Atlas |
||
table_name |
any table name | table_name=ce_y_acc |
domain |
any domain | domain=Mental%20Health |
sub_domain |
any sub-domain | sub_domain=Emotion |
source |
any source | source=Teacher |
metric |
any metric | metric=Volume |
atlas |
any atlas | atlas=Destrieux |
Examples
- link to a specific table:
- link to a specific Imaging table & using MRI Mode:
- link to a domain and sub-domain:
Select Variables
The table on the right hand side displays the data dictionary for the ABCD data resource. It contains information about variables’ names, labels (descriptions), the table they belong to, and additional information like levels for categorical variables or branching/skip logic where appropriate.
Filter/Search
As described above, the table can be used in combination with the tree selector on the left hand side to display only variables that are part of the selected nodes in the tree. But the table provides additional features to filter and search the data dictionary.
Table-wide search
Using the search bar on top of the table, users can search across the complete data dictionary (all displayed columns) and filter the table to only pertain rows that include the search term. For example, typing “depress…” results in the following:

Column-based search
In addition to searching across all displayed columns using the table-wide search option, one can also search specific columns and filter the table to only include rows that contain the search term in this column:

Note: All search and filter options (selections in the tree, table-wide search, and column-based search) can be used collectively to filter the rows displayed in the table.
Column selection
Both the selection and order of columns in the table can be changed by
- clicking on the gear icon at the top of the Select Variables section
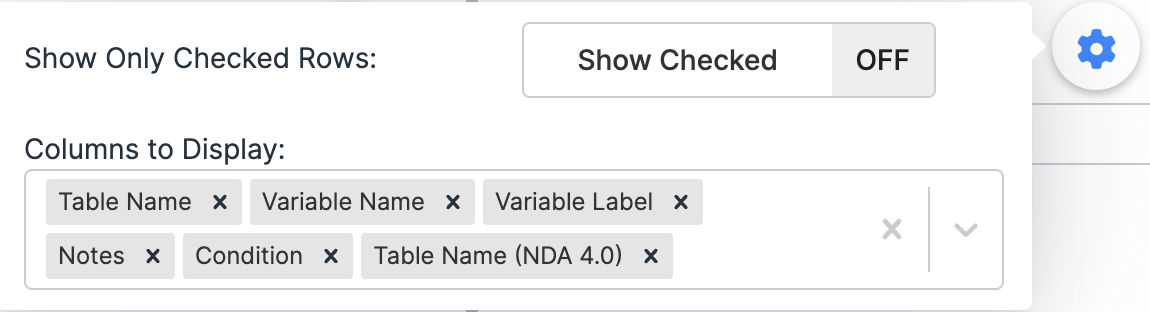
- selecting one the following options:
| Action | Selection |
|---|---|
to remove a column, click on the x on the right side of the respective column in the selector |
 |
| to add a column, select it in the dropdown menu that is displayed when clicking on the expansion triangle on the right-hand side of the selector | 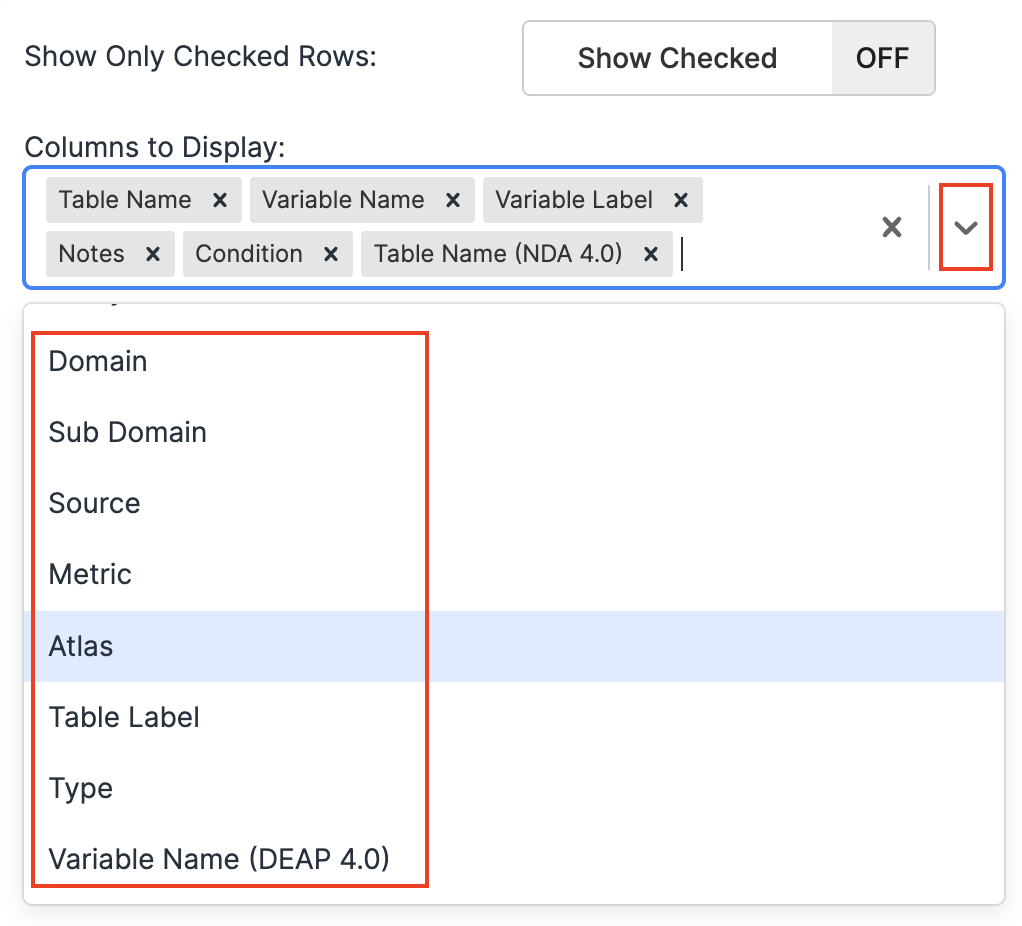 |
| to reorder the columns, drag the column that you would like to move to another position | 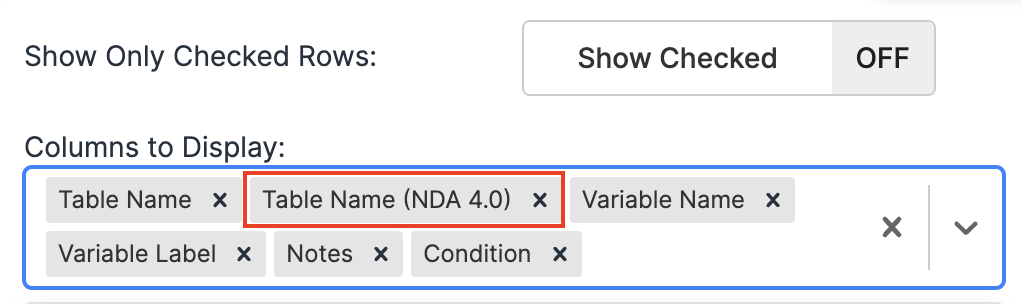 |
Note: To display the variable names that were used for the 4.0 release in DEAP, select to add the “Variable Name (DEAP 4.0)” column
Add variables to selection
To add one or several variables that are displayed in the table to a personal selection, one can
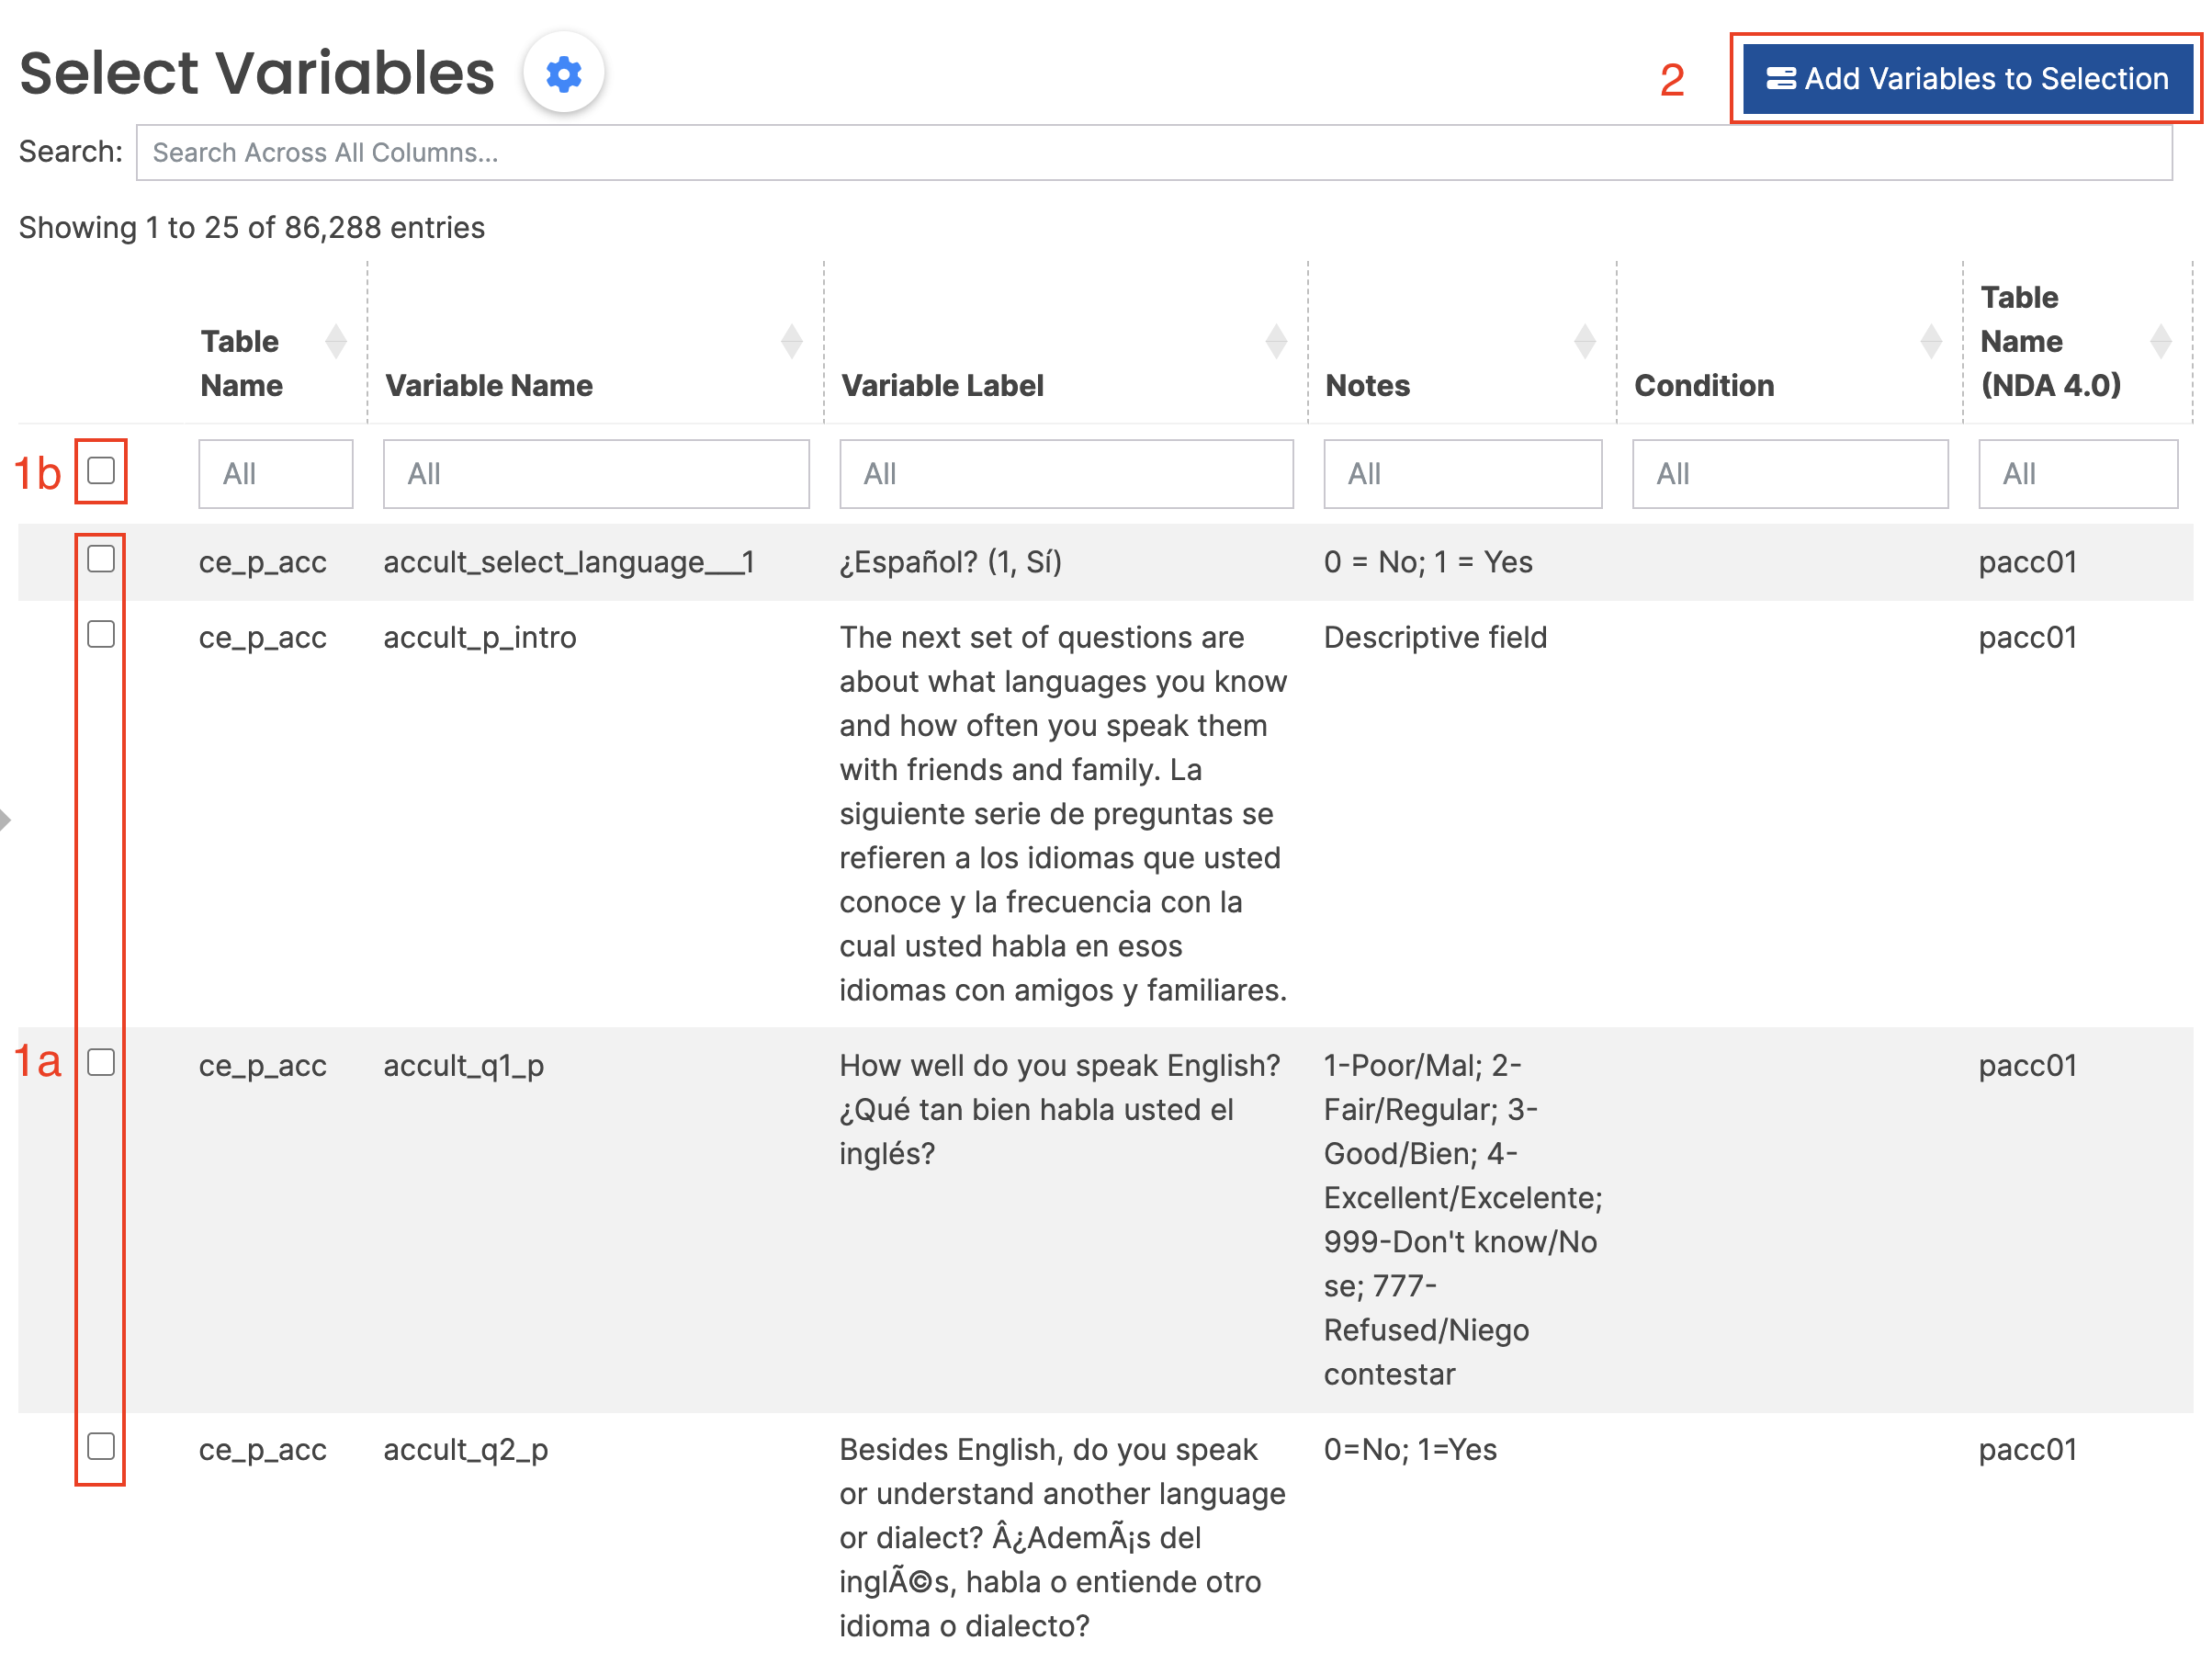
- 1a—either select single variables by clicking on the checkbox for a given row on the left-hand side
- 1b—or by select all variables listed in the table at once by clicking on the checkmark in the top left corner of the table
- 2—then click the “Add Variables to Selection” button in the top right to add the selected rows to the personal selection
The modal in the lower left corner displays the number of checked and selected variables:

Manage Selections and Downloads
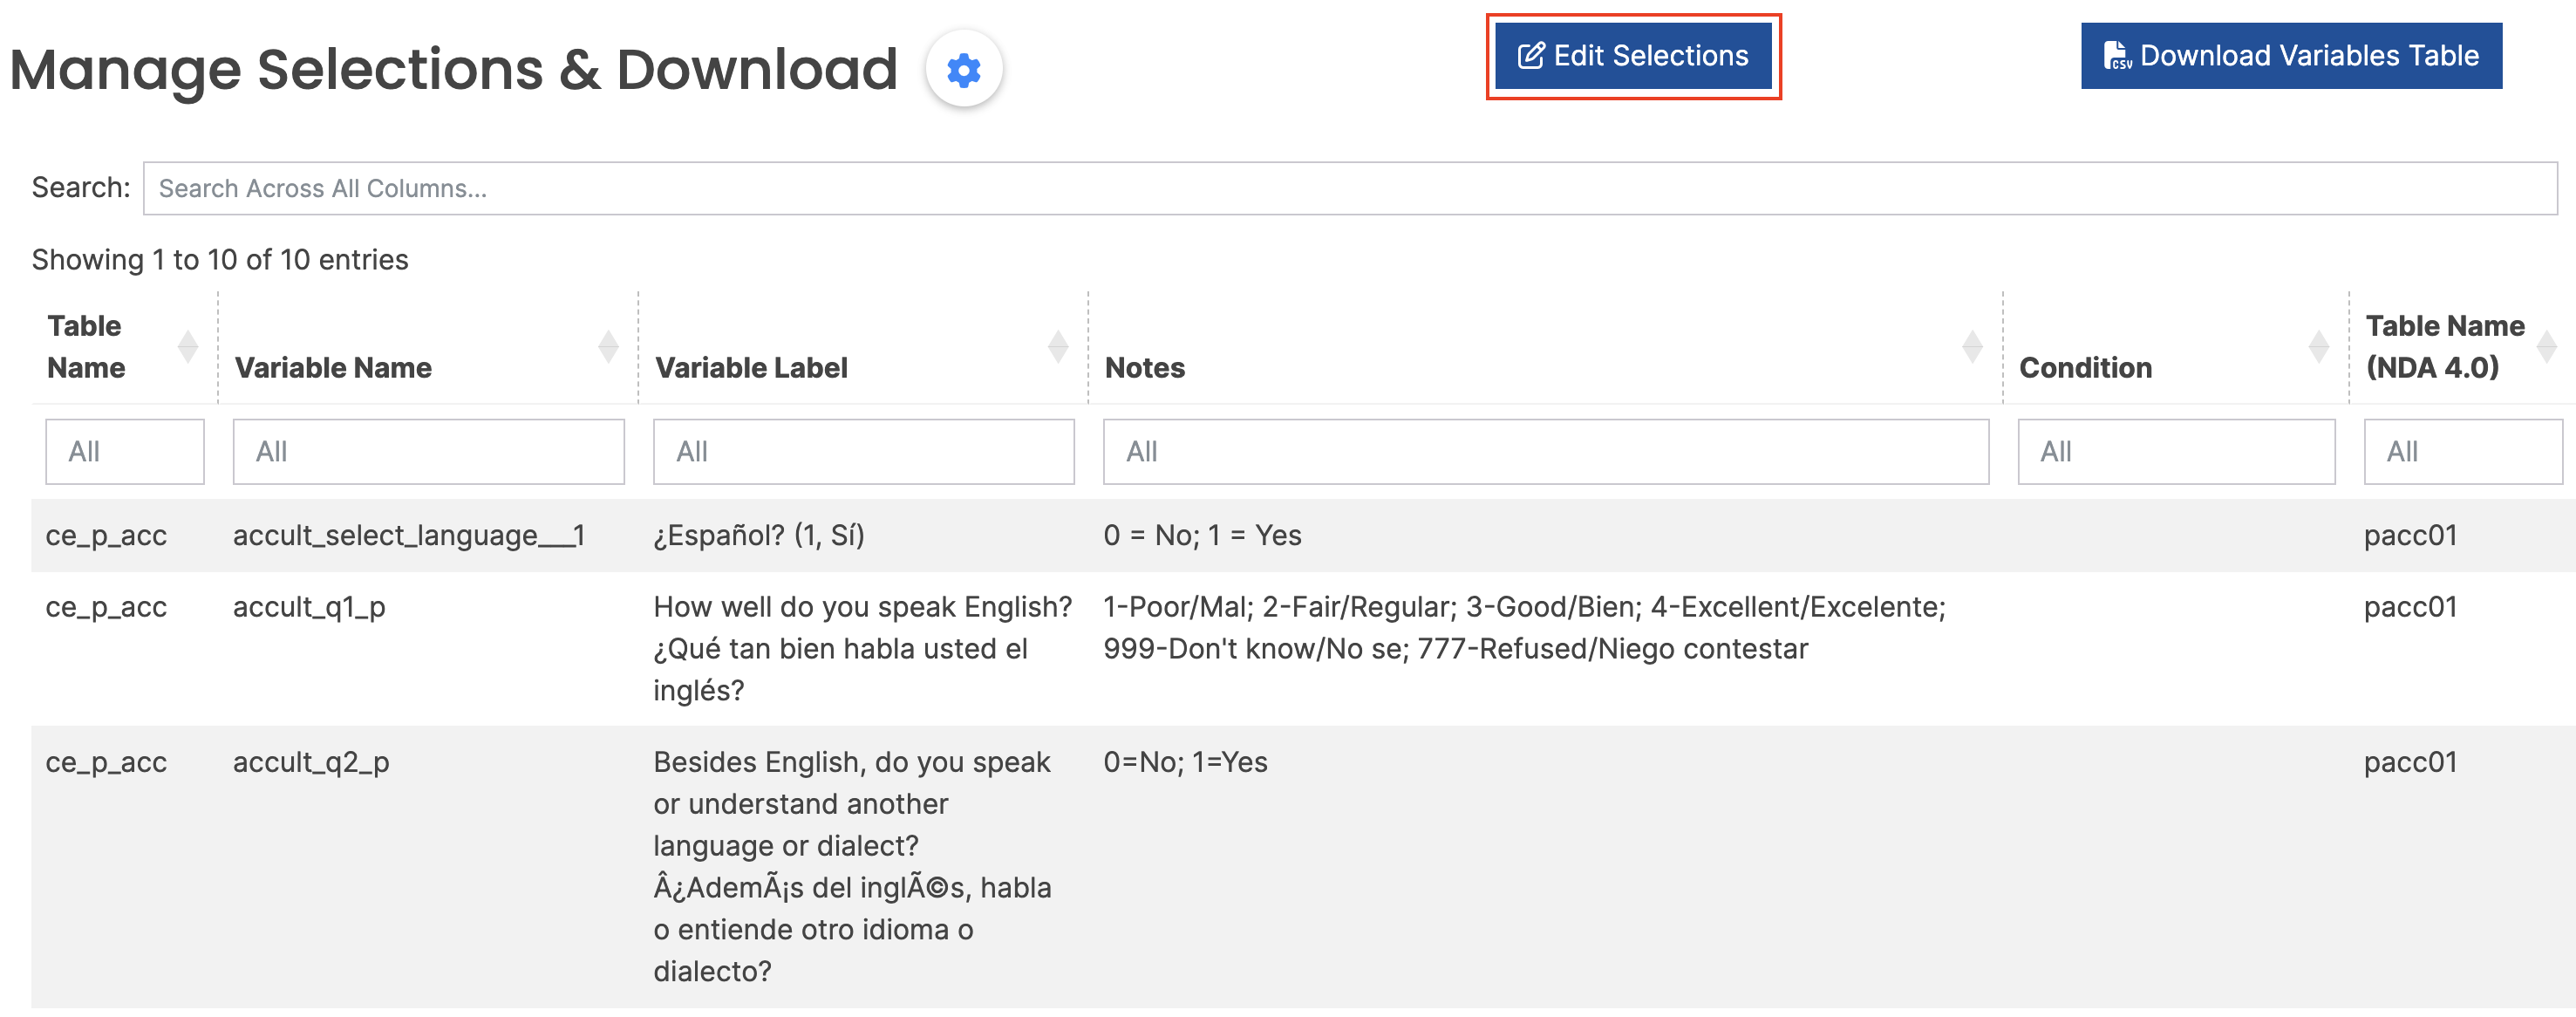
The Manage Selections and Downloads page presents a similar table to the one displayed in the Select Variable section of the Filter Variables page. It displays all variables that have been selected and added to the personal selection as described above.
Note: The page provides the same features to search (across the whole table and column-specific) and to add/remove/reorder columns as exist for the table on the Filter Variables page.
Edit Selections
To modify the current selection of variables, users have to go through the following steps:
- click on “Edit Selections”
- select checkboxes for single variables or all variables on the left-hand side of the table
- click on “Remove Selections” to remove the variables from the personal selection
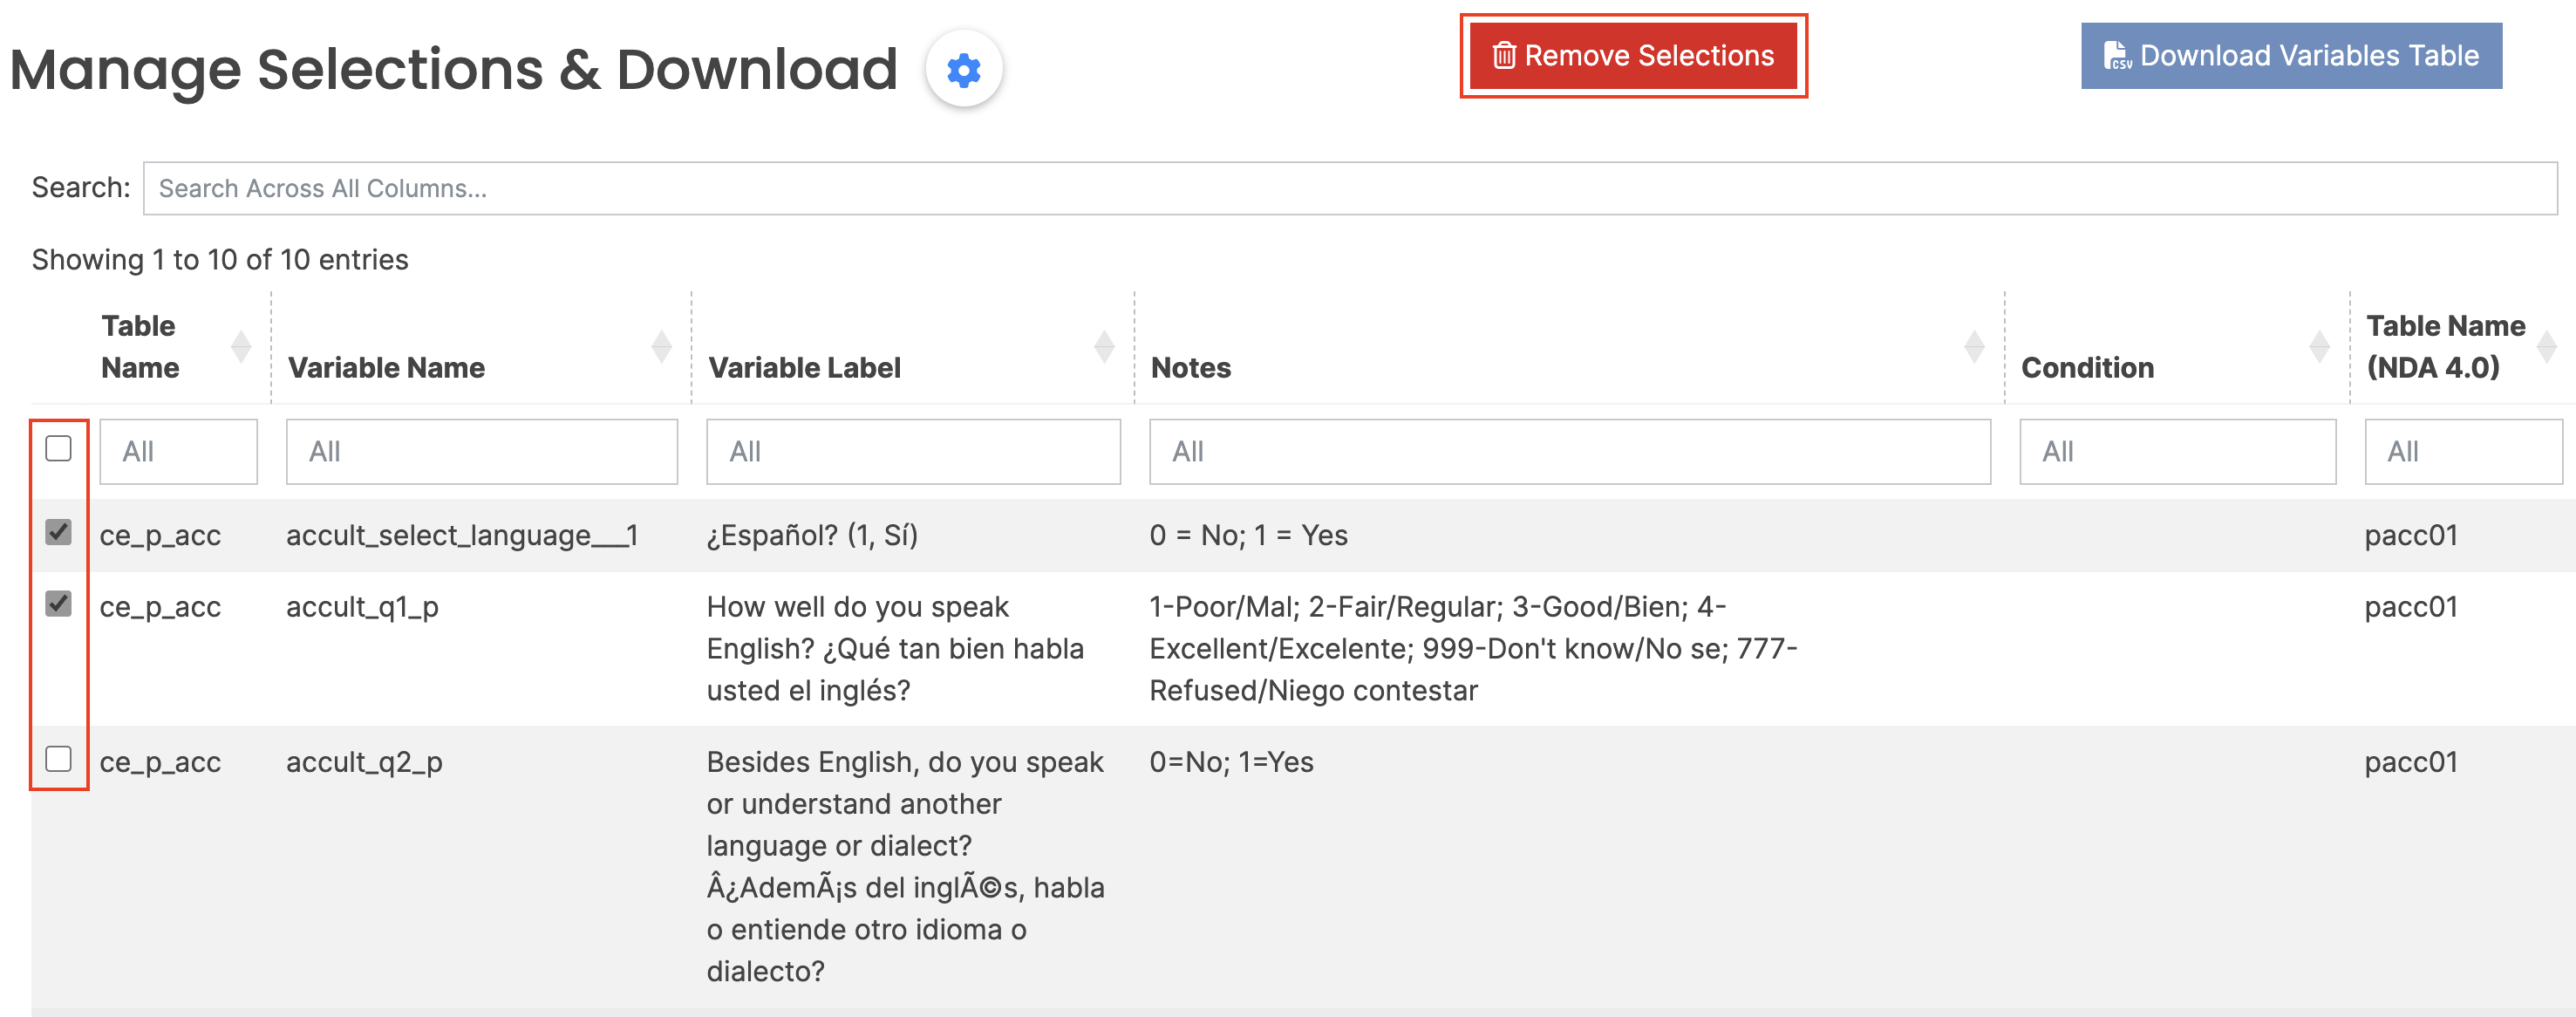
- click on “Submit”
Download Variables Table
To download the data dictionary for the current selection of variables, users can select “Download Variables Table”. This will initiate the data dictionary to be downloaded to the local machine as a .csv file.
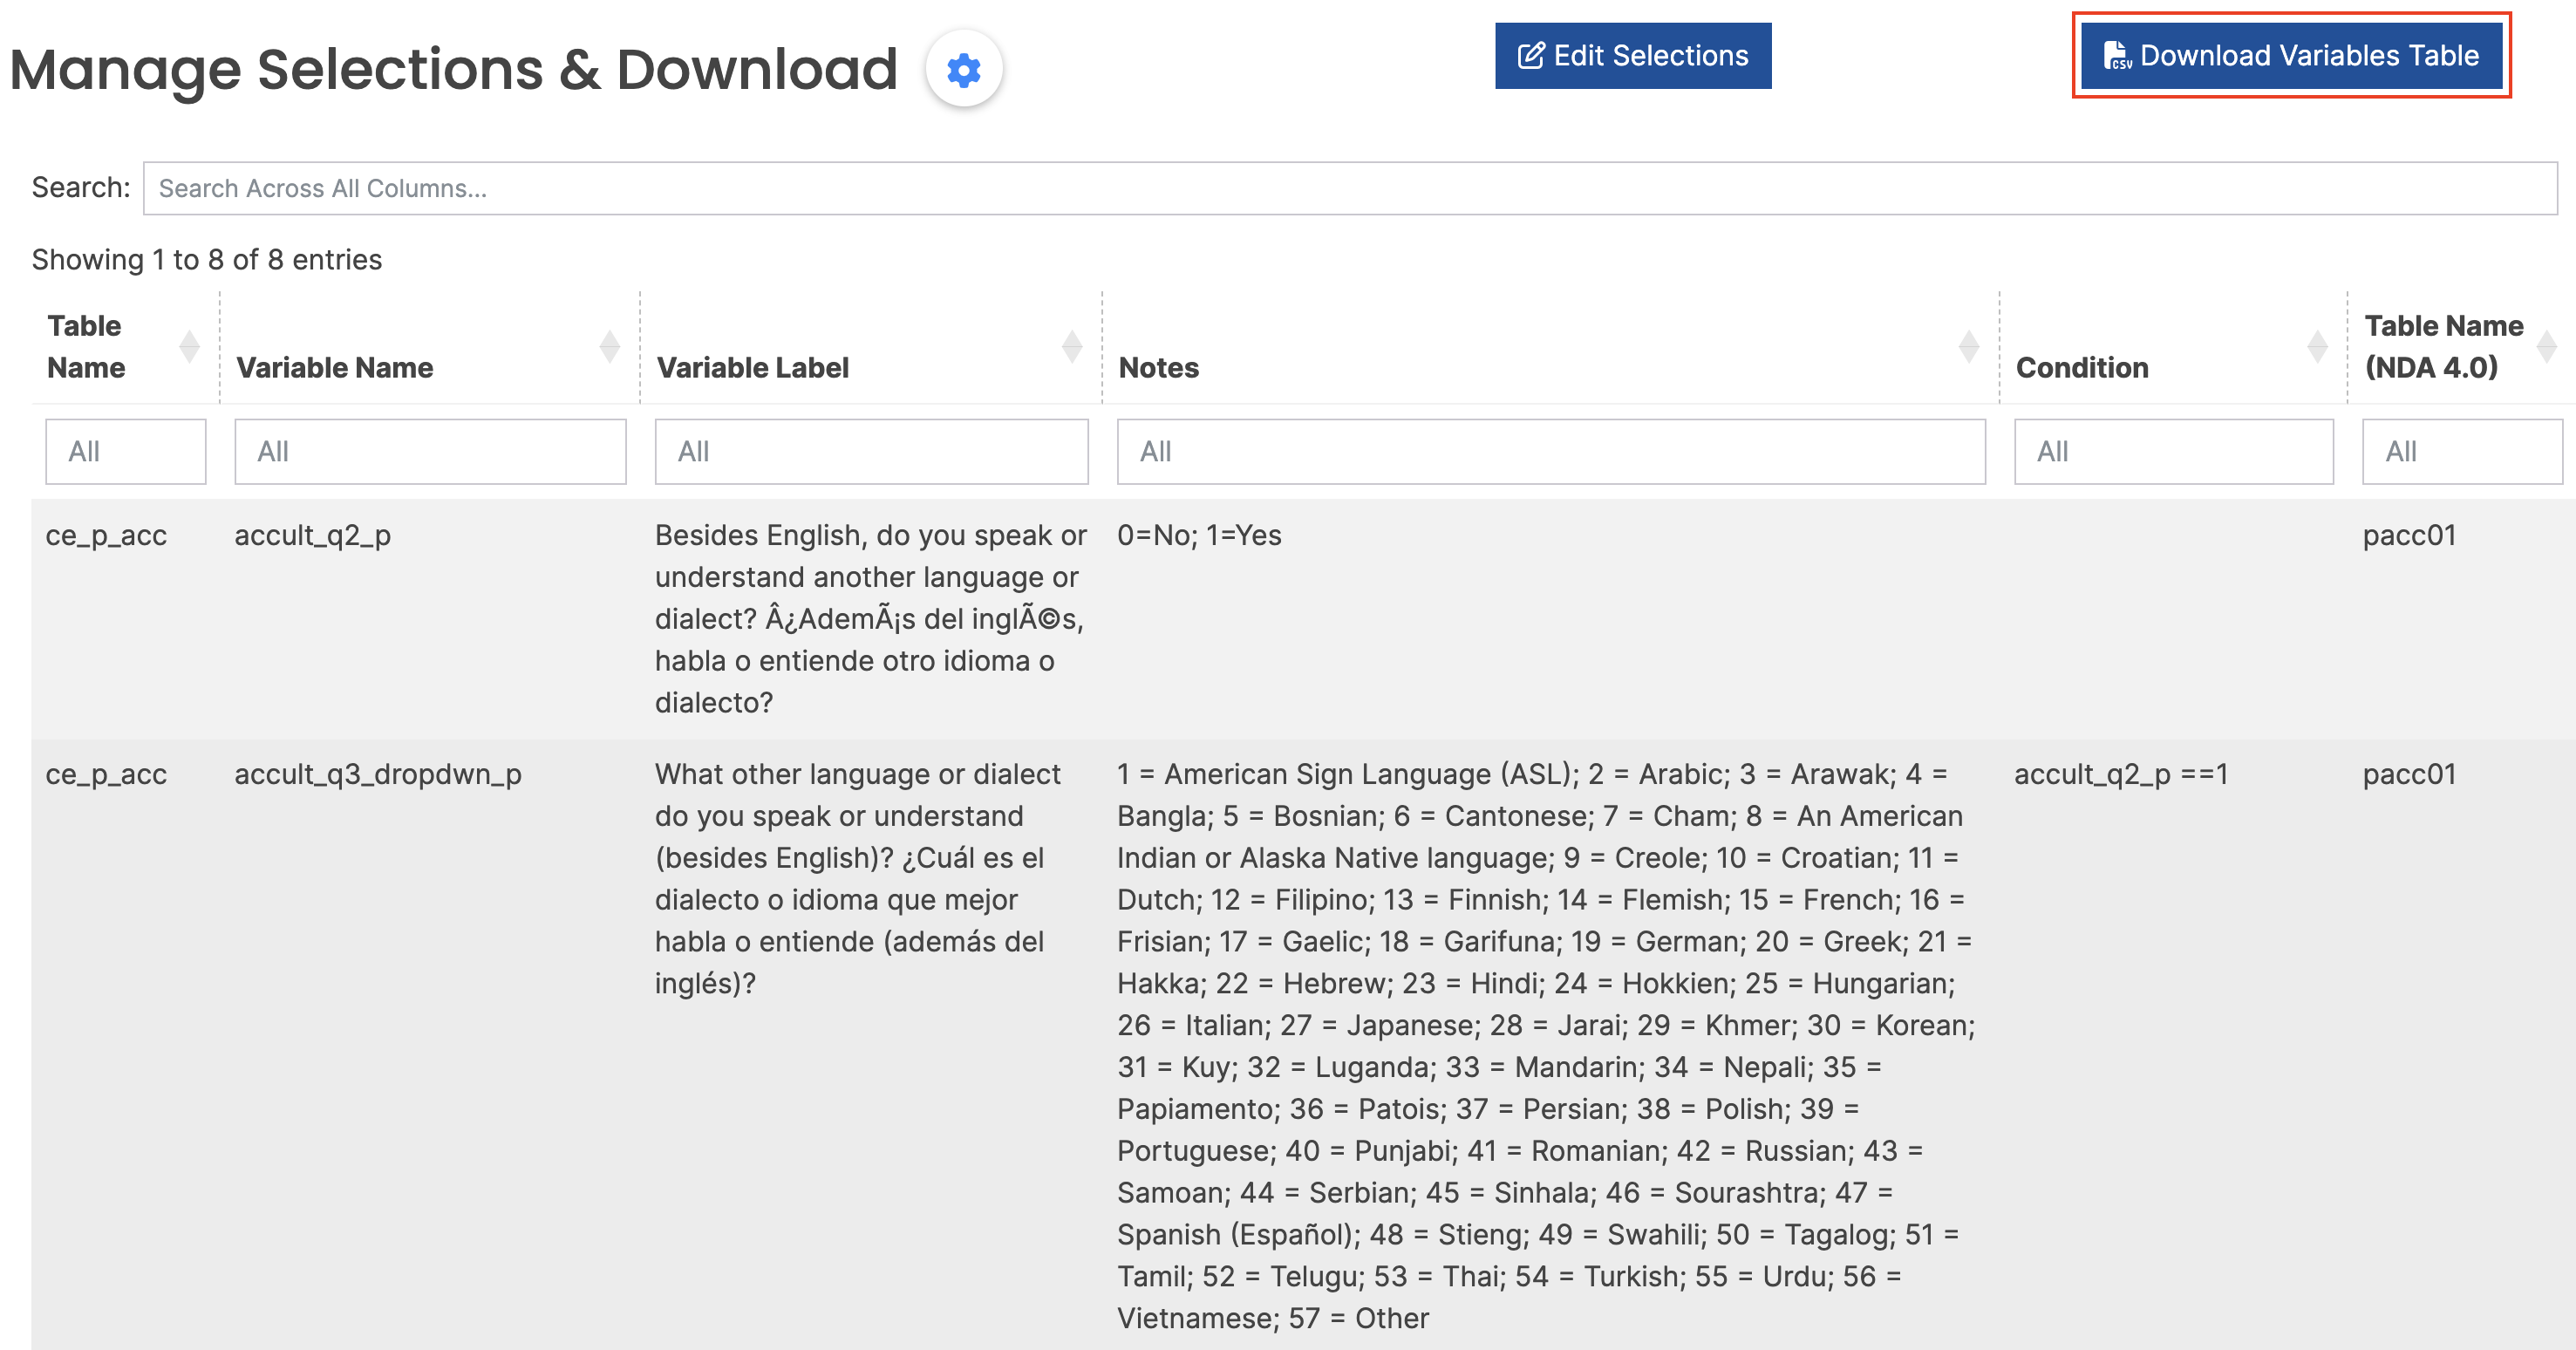
Note: The data dictionary explorer can only be used to explore and download the ABCD data dictionary. It cannot be used to download the actual data. Users with a valid data use certificate can download the data through NDA (see also the release note Start Page).